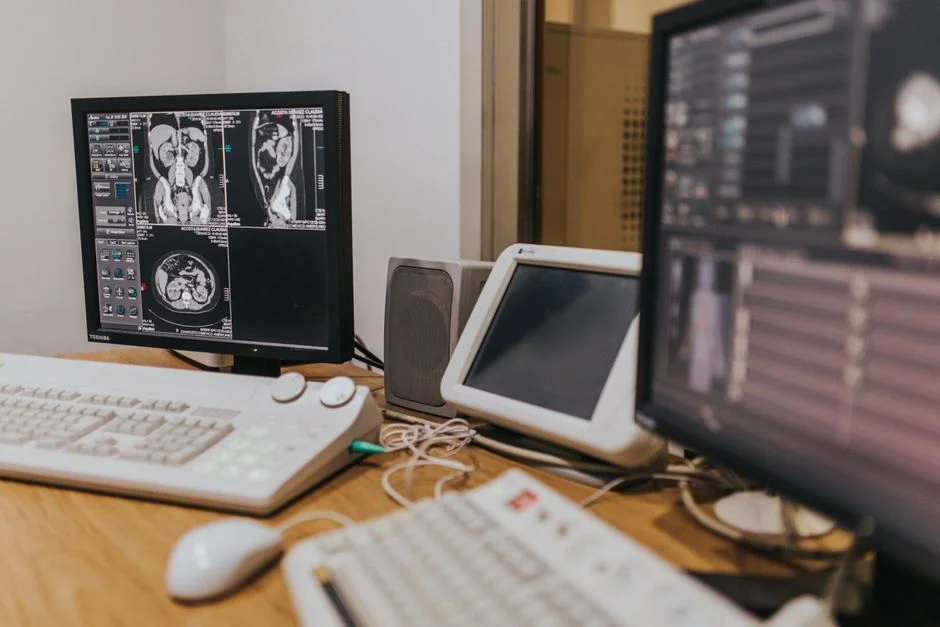

An **image tiler** is a specialized software system designed to break down very large images into smaller, manageable, uniformly sized pieces, known as tiles. This process is critical for efficient storage, rapid transmission over networks, and smooth interactive viewing of high-resolution imagery, particularly in applications like mapping, medical imaging, and digital archives. By segmenting vast images, tiling systems significantly reduce the computational and network overhead associated with handling entire files, enabling responsive user experiences.
The challenge with un-tiled large images is their inherent bulk. Loading a multi-gigapixel image into memory or transmitting it over a standard internet connection can be prohibitively slow, leading to frustrated users and inefficient resource utilization. Without a robust tiling mechanism, applications struggle with memory limits, rendering delays, and a poor interactive experience, making high-resolution data practically unusable. This article will explore the architectural considerations and practical implementations for building effective image tiling solutions, focusing on performance, scalability, and maintainability.
What is an Image Tiler? Core Concepts and Architectural Foundations
An **image tiler** is a software component or system that dissects a single, often massive, high-resolution source image into a multi-resolution pyramid of smaller, fixed-size image segments called tiles. This fundamental process enables efficient streaming, rendering, and interactive navigation of imagery that would otherwise overwhelm client-side memory or network bandwidth. The core concept revolves around the principle of
At its heart, an image tiler addresses the practical limitations of displaying and manipulating extremely large raster data. Consider a satellite image covering an entire continent at high resolution, or a gigapixel scan of a historical document. Loading such an image as a single file into a web browser or even a desktop application is often impossible due to memory constraints, and certainly impractical for real-time interaction due to network latency and rendering overhead. Tiling mitigates these issues by creating a hierarchical structure:
- Tiles: Small, square image files (e.g., 256×256 pixels or 512×512 pixels) that represent a specific geographic or spatial region of the original image.
- Pyramid Structure (Levels of Detail): The original image is resampled and tiled at various zoom levels. The lowest zoom level consists of a few large tiles covering the entire image at low resolution, while the highest zoom level contains many small tiles representing the original image’s full resolution. This allows clients to request only the necessary detail for the current view.
- Coordinate System: Each tile is uniquely identified by its zoom level, row, and column coordinates, allowing client applications to precisely request the parts of the image currently visible in the viewport.
The architectural foundation of an image tiling system typically involves a pipeline: an
The Anatomy of an Image Tiler: Key Components
A robust image tiling system is comprised of several interconnected components, each with a distinct responsibility, working in concert to transform a raw, large image into a readily consumable tiled dataset. Understanding this anatomy is crucial for designing a scalable and maintainable solution.
Source Image Ingestion Module
This module is responsible for accepting the initial large image. It handles various input formats (e.g., TIFF, JPEG2000, PNG) and might perform initial validation, metadata extraction, or basic normalization. For very large files, it might involve streaming uploads or direct access to cloud storage. Error handling at this stage is critical, as corrupted or malformed input can cascade into processing failures. This module often triggers the subsequent tiling process.
Tiling Engine (Processor)
The core of the system, the tiling engine, takes the ingested image and generates the multi-resolution tile pyramid. This component is typically CPU and I/O intensive. Key operations include:
- Resampling: Downscaling the original image to create lower resolution levels for the pyramid. This requires high-quality interpolation algorithms to prevent aliasing and maintain visual fidelity.
- Segmentation: Dividing each resolution level into fixed-size tiles. This involves precise coordinate calculations to ensure tiles align correctly.
- Encoding: Compressing each tile into a web-friendly format (e.g., JPEG, WebP, PNG). Compression quality and file size are critical trade-offs here.
- Metadata Generation: Creating unique identifiers (zoom, x, y) for each tile and potentially storing additional information like image dimensions, color profiles, or original source references.
Performance considerations for the tiling engine often involve parallel processing. Utilizing multi-core CPUs and distributing tasks across multiple worker processes or even machines can drastically reduce tiling times for extremely large images. Tools like
Storage Layer
Once generated, tiles need to be persistently stored. The choice of storage affects retrieval performance, cost, and scalability. Common options include:
- File System: For smaller deployments, organizing tiles in a directory structure (e.g.,
/tiles/{image_id}/{zoom}/{x}/{y}.jpg ) on local or network-attached storage. - Object Storage: Cloud-based solutions like Amazon S3, Google Cloud Storage, or Azure Blob Storage offer high availability, durability, and scalability, often at a lower cost per gigabyte. They also integrate well with Content Delivery Networks (CDNs).
- Database: Less common for binary tile data itself, but databases are crucial for storing metadata about images, tile sets, and their relationships. A relational database might store image IDs, tiling parameters, and references to object storage paths.
Efficient indexing and retrieval from the storage layer are paramount for the serving component.
Serving Layer (API/CDN Integration)
This component exposes the tiled images to client applications. It typically consists of a web server (e.g., Nginx, Apache) or a dedicated API endpoint that can receive tile requests (e.g.,
Queueing System
Given the potentially long-running and resource-intensive nature of image tiling, a queueing system (e.g., Redis queues with Laravel Horizon, RabbitMQ, SQS) is indispensable. It decouples the ingestion process from the tiling process, allowing images to be submitted for tiling asynchronously. This improves responsiveness for users and provides resilience against processing failures, as failed jobs can be retried.
Database for Metadata and Job Management
A database stores information about the original images, the status of tiling jobs, the generated tile sets, and any access control lists. This is critical for managing the lifecycle of images and providing an administrative interface. For robust data integrity and efficient querying, a relational database like MySQL or PostgreSQL is usually preferred.
Each of these components contributes to the overall stability and performance of an image tiling system. Thoughtful design and selection of technologies for each part are crucial for building a solution that can handle the demands of high-resolution imagery at scale.
Tiling Strategies and Algorithms: Optimizing for Performance
The choice of tiling strategy and the underlying algorithms significantly impacts the performance, storage efficiency, and client-side experience of an image tiler. Different strategies cater to distinct use cases, each presenting its own set of trade-offs.
Fixed-Size Tiling
This is the most common and straightforward approach. The original image is divided into a grid of uniform, square tiles (e.g., 256×256 pixels) at each zoom level. The highest zoom level represents the original image’s full resolution. Lower zoom levels are generated by repeatedly downscaling the image by a factor of two and then tiling it. This creates a pyramid where each level has four times as many tiles as the level above it, but each tile covers one-fourth the area at twice the resolution. This strategy is simple to implement and widely supported by client-side libraries.
Advantages:
- Simplicity: Easy to calculate tile coordinates and boundaries.
- Predictable Access: Client applications can easily determine which tiles to request based on viewport.
- CDN-Friendly: Uniform tile sizes are highly cacheable.
Disadvantages:
- Wasteful for Sparse Areas: If large parts of the image are blank or contain little detail, empty or redundant tiles are still generated and stored.
- Edge Cases: Images not perfectly divisible by tile size require padding or partial tiles.
Quadtree Tiling (Deep Zoom)
Popularized by Microsoft’s Deep Zoom technology, quadtree tiling is an extension of fixed-size tiling. It uses a hierarchical data structure where each node represents a spatial region, and if that region contains further detail, it’s subdivided into four child nodes (a quadtree). This is implicitly what happens when you generate a fixed-size tile pyramid; the quadtree structure is the logical organization of the tiles. In practice, ‘Deep Zoom’ refers to a specific implementation where tiles are often generated with a small overlap to prevent visual seams and are served with a specific XML manifest.
Advantages:
- Efficient for Irregular Images: Can be more efficient than simple fixed-size tiling if combined with sparse tiling techniques (see below).
- Smooth Zooming: Designed for seamless, continuous zooming experiences.
Disadvantages:
- Complexity: Requires more sophisticated client-side rendering logic.
- Manifest Overhead: Often requires an XML or JSON manifest file to describe the tile set, adding a small overhead.
Sparse Tiling
This is not a primary tiling strategy but an optimization that can be applied to fixed-size or quadtree tiling. Instead of generating and storing every possible tile, sparse tiling only creates tiles for regions that contain actual image data or significant detail. If a tile is entirely transparent, empty, or below a certain detail threshold, it is simply not generated or stored. When a client requests such a tile, the server returns a 404 or a pre-generated blank tile.
Advantages:
- Storage Reduction: Significantly reduces storage requirements for images with large areas of uniform color or transparency.
- Faster Processing: Avoids processing and encoding empty tiles.
Disadvantages:
- Increased Server-Side Logic: The serving layer needs to handle missing tiles gracefully.
- Client-Side Complexity: Clients might need to distinguish between missing tiles and actual blank tiles.
Algorithms for Resampling and Compression
Regardless of the tiling strategy, the quality and efficiency of resampling and compression algorithms are critical:
- Resampling (Interpolation): When downscaling images for lower zoom levels, algorithms like
Lanczos ,Bicubic , orBilinear interpolation are used. Lanczos generally provides the best quality but is computationally more intensive. Bicubic offers a good balance. - Compression: For web delivery, JPEG is common for photographic images due to its excellent compression ratio with acceptable lossiness. PNG is preferred for images with transparency or sharp edges (e.g., maps, diagrams). WebP offers superior compression for both lossy and lossless scenarios but might have broader browser support considerations. The choice impacts file size and visual quality. Optimizing image assets, including their compression and format, is a critical part of efficient web development, often managed through build processes that involve tools similar to those used with Next.js npm packages.
Implementing these strategies requires careful consideration of the trade-offs between processing time, storage costs, network bandwidth, and the desired user experience. For example, generating all tiles at all zoom levels upfront offers faster serving but higher storage. Dynamic on-demand tiling saves storage but introduces latency on first access. A hybrid approach, pre-generating common zoom levels and dynamically generating higher-detail tiles, often provides the best balance.
Data Storage and Retrieval for Tiled Images
The persistence and efficient retrieval of generated image tiles are foundational to any high-performance image tiler. The chosen storage solution must balance cost, access speed, scalability, and durability. A common architecture involves a combination of object storage for the binary tile data and a database for metadata.
Object Storage for Tile Data
For the raw image tiles themselves, object storage services are almost universally preferred in modern cloud-native architectures. Services like Amazon S3, Google Cloud Storage, or Azure Blob Storage offer:
- Scalability: Virtually unlimited storage capacity, scaling automatically with demand.
- Durability: Data is replicated across multiple availability zones, offering high resilience against hardware failures.
- Cost-Effectiveness: Typically cheaper per gigabyte than block storage or databases, especially for infrequently accessed data (though tiles are often frequently accessed, so hot storage tiers are usually chosen).
- API Access: Simple HTTP-based APIs make integration straightforward, and they integrate seamlessly with CDNs.
When storing tiles in object storage, a logical folder structure is crucial for organization and retrieval. A common pattern is
// Example Laravel configuration for S3 storage path
's3_tile_path' => 'tiles/{image_id}/{z}/{x}/{y}.jpg',

// Example S3 URL construction
$s3Client = new Aws\S3\S3Client([...]);
$command = $s3Client->getCommand('GetObject', [
    'Bucket' => 'my-image-tiles',
    'Key'    => sprintf("tiles/%s/%d/%d/%d.jpg", $imageId, $zoom, $x, $y)
]);
$request = $s3Client->createPresignedRequest($command, '+20 minutes');
$presignedUrl = (string) $request->getUri();
This structure allows for efficient storage and retrieval. Furthermore, object storage often provides features like versioning, lifecycle policies (to move older tiles to colder storage tiers), and robust access control.
Database for Metadata Management
While object storage handles the binary tile data, a relational database (e.g., MySQL, PostgreSQL) is essential for managing the metadata associated with images and their tile sets. This includes:
- Image Information: Original file name, dimensions, upload date, processing status, and a unique identifier.
- Tiling Parameters: Tile size, number of zoom levels, compression quality, and format.
- Access Control: Who can view which image/tile set.
- Job Status: Tracking the progress and status of tiling jobs.
Proper indexing of database tables is critical for fast lookups. For instance, an
Caching Strategies
Even with efficient storage, repeated requests for the same tiles can put a strain on the serving layer and incur egress costs from object storage. Caching is paramount:
- Content Delivery Network (CDN): This is the primary caching layer for production image tilers. A CDN caches tiles at edge locations globally, serving them directly to users with minimal latency. Proper cache-control headers (e.g.,
Cache-Control: public, max-age=31536000, immutable ) are vital to ensure tiles are cached effectively. - Server-Side Caching: An intermediate caching layer (e.g., Redis, Memcached) on the application server can store frequently accessed tiles, reducing calls to object storage. This is particularly useful for tiles that are not yet propagated to the CDN or for internal APIs.
- Client-Side Caching: Web browsers inherently cache resources. Ensuring appropriate HTTP cache headers allows browsers to store tiles locally, preventing redundant requests.
The combination of object storage, a well-indexed database, and aggressive caching via a CDN forms a highly performant and scalable data storage and retrieval architecture for image tiling systems. This layered approach ensures that tiles are delivered rapidly to end-users while keeping operational costs manageable.
Processing Pipeline: From Raw Image to Tiled Output
The journey from a raw, high-resolution source image to a complete, ready-to-serve tiled output involves a sophisticated processing pipeline. This pipeline must be robust, efficient, and capable of handling varying image sizes and formats while managing system resources effectively. A typical pipeline in a Laravel context leverages queues for asynchronous processing.
1. Image Ingestion and Validation
The process begins when a user uploads a large image, or it’s ingested from an external source. The initial step involves:
- Upload Handling: Securely receiving the image file. For very large files, chunked uploads or direct-to-cloud storage uploads (e.g., S3 pre-signed URLs) are often employed to bypass server memory limits.
- Basic Validation: Checking file type, size, and integrity. This prevents malformed files from entering the pipeline.
- Metadata Extraction: Extracting essential metadata like dimensions, format, and color profile.
- Temporary Storage: Storing the raw image in a temporary location (e.g., local disk, dedicated S3 bucket) before processing.
Once ingested, a record is created in the database, and a job is dispatched to a queue.
2. Queued Processing and Job Orchestration
Given the resource-intensive nature of image manipulation, processing is almost always asynchronous. A **job queue** (e.g., Laravel’s queue system with Redis or SQS) is critical here. The initial job might be
// In an ImageUploadController.php
use App\Jobs\ProcessImageForTiling;
use Illuminate\Support\Facades\Bus;

// ... after storing the uploaded image and creating an Image record ...
$image = Image::create([ /* ... */ ]);
ProcessImageForTiling::dispatch($image->id)->onQueue('tiling');

// In ProcessImageForTiling.php
class ProcessImageForTiling implements ShouldQueue
{
    use Dispatchable, InteractsWithQueue, Queueable, SerializesModels;

    public $imageId;

    public function __construct($imageId)
    {
        $this->imageId = $imageId;
    }

    public function handle()
    {
        $image = Image::findOrFail($this->imageId);
        // Mark image as processing
        $image->status = 'processing';
        $image->save();

        // Dispatch jobs for each zoom level or a single job for all tiling
        Bus::chain([
            new GenerateLowResPreview($this->imageId),
            new GenerateTilePyramid($this->imageId),
            new UpdateImageStatus($this->imageId, 'completed')
        ])->dispatch();
    }
}
This allows the web server to respond quickly to user requests while the heavy lifting occurs in the background on dedicated worker processes.
3. Image Preparation and Resampling
Before tiling, the image might need preprocessing:
- Color Space Conversion: Ensuring a consistent color space (e.g., sRGB).
- Rotation/Cropping: Applying any user-defined transformations.
- Initial Resampling: Creating the highest resolution layer of the tile pyramid. This might involve scaling down the original image slightly if it’s excessively large, or optimizing its format for the tiling engine.
This stage often uses powerful image manipulation libraries.
4. Tile Generation (The Tiling Engine in Action)
This is where the image is actually broken down. For each zoom level, the image is resampled and then segmented into tiles. Libraries like
libvips can process images with very low memory usage, as it streams data rather than loading the entire image into RAM. This is crucial for gigapixel images.- It supports parallel processing, making it fast.
# Example using vips command line to generate deepzoom tiles
vips dzsave original_image.tif output_folder --layout dz --suffix .jpg[Q=85] --tile-size 256
Each generated tile is then uploaded to the configured object storage (e.g., S3). This upload can also be queued for large numbers of tiles to prevent bottlenecks.
5. Metadata Update and Indexing
As tiles are generated and stored, the database is updated with their locations and status. This includes:
- Updating the image record with the number of generated tiles, total storage size, and completion timestamp.
- Potentially indexing tile information if a custom serving layer requires it (though direct object storage paths often suffice).
6. Post-Processing and Cleanup
Finally, once all tiles are generated and stored, any temporary files are removed, and the original raw image might be moved to archival storage or deleted, depending on policy. The image status in the database is updated to ‘completed’.
This entire pipeline, orchestrated by a robust job queue and leveraging efficient image processing tools, ensures that even the largest images can be transformed into tiled datasets reliably and efficiently, ready for consumption by client applications. The use of well-defined processes and robust error handling within this pipeline is akin to the structured approach taken in software testing services, ensuring quality and reliability throughout the conversion lifecycle.
Serving Tiled Images: Protocols and Client-Side Integration
Once an image is tiled and stored, the next critical phase is serving these tiles efficiently to client applications. This involves choosing appropriate protocols and integrating with client-side viewers to deliver a seamless, interactive experience. The primary goal is low latency and high throughput.
Standard Web Protocols: HTTP/HTTPS
The vast majority of tiled image serving relies on standard HTTP/HTTPS. Each tile is treated as an individual web resource, uniquely addressable via a URL. A typical tile request URL follows a pattern like:
GET /images/{image_id}/{zoom_level}/{x_coordinate}/{y_coordinate}.jpg HTTP/1.1
Host: cdn.example.com
This simplicity is powerful because it allows leveraging the entire web infrastructure:
- Content Delivery Networks (CDNs): Essential for global reach and low latency. CDNs cache tiles at edge locations, serving them from the nearest point to the user. This offloads significant traffic from the origin server.
- HTTP Caching: Proper
Cache-Control andETag headers allow browsers and intermediate proxies to cache tiles effectively, reducing repeated requests. Given that tiles are immutable once generated, long cache durations (e.g., one year) are appropriate. - Range Requests: While less common for individual tiles, HTTP range requests could theoretically be used for very large tiles or custom streaming protocols.
Client-Side Viewers and Libraries
The client application is responsible for requesting and assembling the tiles into a coherent image for the user. Dedicated JavaScript libraries simplify this complex task:
- OpenLayers and Leaflet: These are popular open-source mapping libraries that natively support various tile layers, including XYZ (standard fixed-size tile map services) and WMS/WMTS. They handle the logic of determining which tiles are visible in the viewport, requesting them, and rendering them onto a canvas or WebGL context.
- OpenSeadragon: Specifically designed for deep zoom and high-resolution image viewing. It’s highly optimized for smooth panning and zooming of large tiled images, often used in digital archives, medical imaging, and art galleries. It supports various tile sources, including Deep Zoom (DZI) and IIIF (International Image Interoperability Framework) image API.
- Custom Viewers: For specialized applications, a custom viewer might be developed using WebGL (e.g., Three.js) for highly interactive 3D environments or very specific rendering needs. This offers maximum flexibility but also requires significant development effort.
// Example using OpenSeadragon to load a Deep Zoom image
var viewer = OpenSeadragon({
    id: "openseadragon-viewer",
    prefixUrl: "/openseadragon/images/", // Path to OpenSeadragon assets
    tileSources: {
        type: 'image',
        url: '/path/to/image_id/info.json' // IIIF or Deep Zoom JSON manifest
    },
    // ... other configuration options
});

// Example using Leaflet to add a standard XYZ tile layer
var map = L.map('leaflet-map').setView([51.505, -0.09], 13);
L.tileLayer('https://{s}.tile.openstreetmap.org/{z}/{x}/{y}.png', {
    maxZoom: 19,
    attribution: '© OpenStreetMap'
}).addTo(map);

// To add your custom tiles:
L.tileLayer('https://cdn.example.com/images/{image_id}/{z}/{x}/{y}.jpg', {
    maxZoom: 22, // Your max zoom level
    attribution: 'My Tiled Image'
}).addTo(map);
International Image Interoperability Framework (IIIF)
For cultural heritage institutions, museums, and libraries, IIIF has emerged as a critical standard. It defines a set of APIs for delivering and consuming images, including a Image API that specifies how to request regions, sizes, and rotations of an image, often backed by tiled image servers. Adopting IIIF ensures broad interoperability and allows images to be consumed by a wide ecosystem of viewers and tools.
Effective serving of tiled images relies on a robust backend infrastructure (Laravel API, Nginx), aggressive caching (CDN), and intelligent client-side rendering. This combination ensures that users experience fast, fluid interaction with even the largest and most detailed imagery.
Performance Engineering: Benchmarking and Optimization
Achieving high performance in an image tiling system requires continuous benchmarking and strategic optimization across the entire pipeline. Bottlenecks can emerge at any stage, from image ingestion and processing to storage and serving. Identifying and addressing these is key to delivering a responsive and scalable solution.
Benchmarking the Tiling Engine
The tile generation phase is often the most CPU and I/O intensive. Benchmarking this component is crucial:
- Input Image Characteristics: Test with a variety of image sizes, formats, and complexities (e.g., highly detailed vs. sparse, different color depths).
- Tiling Parameters: Vary tile size (e.g., 256×256 vs. 512×512), compression quality, and output format (JPEG, WebP). Quantify the impact on processing time, output file size, and visual quality.
- Resource Utilization: Monitor CPU, memory, and disk I/O during tiling. Tools like
top ,htop ,iostat , or cloud-provider specific monitoring (e.g., AWS CloudWatch) are invaluable. - Library Comparison: If possible, benchmark different image processing libraries (e.g., ImageMagick, GraphicsMagick, libvips) for your specific workloads.
libvips is often lauded for its speed and low memory footprint, especially for very large images, due to its streaming architecture.
# Example benchmarking for vips
# Time how long it takes to convert a large image to Deep Zoom
time vips dzsave large_image.tif output_folder --layout dz --suffix .jpg[Q=85] --tile-size 256

# Compare with ImageMagick (often slower for large images)
time convert large_image.tif -define jpeg:tile-geometry=256x256 -compress JPEG -quality 85 tile_%d.jpg
Optimization Techniques for Tile Generation
- Parallel Processing: Utilize all available CPU cores. Many image processing libraries (like
libvips ) are multi-threaded. For Laravel, dispatching multiple tiling jobs to a queue and running multiple queue workers allows for concurrent processing. - Memory Management: For extremely large images, avoid loading the entire image into RAM. Libraries that stream image data (like
libvips ) are preferred. Configure PHP’s memory limits appropriately for queue workers. - Efficient I/O: Use fast storage for temporary files during processing (e.g., SSDs). Optimize database queries for metadata lookups.
- Asynchronous Uploads: Instead of blocking the tiling process while uploading each tile to object storage, consider batching uploads or using asynchronous upload mechanisms.
- Pre-computation vs. On-demand: For frequently accessed images, pre-compute all tiles. For rarely accessed or very dynamic images, consider on-demand tiling, where tiles are generated only when requested (though this introduces initial latency).
Network and Serving Layer Optimization
- CDN Integration: As previously mentioned, a CDN is non-negotiable for production systems. Configure it correctly with appropriate cache-control headers.
- Image Format and Compression: Optimize tile size and compression quality. Smaller tiles mean more HTTP requests but smaller individual downloads. WebP offers better compression than JPEG/PNG but might require fallback for older browsers. Balance quality with file size.
- HTTP/2 or HTTP/3: Modern protocols like HTTP/2 (and HTTP/3) improve performance by allowing multiple requests over a single connection, reducing overhead for many small tile requests.
- Origin Server Tuning: Ensure your web server (Nginx) is optimally configured for serving static files, with proper caching headers and sufficient worker processes.
A systematic approach to performance engineering, involving continuous monitoring, profiling, and iterative optimization, is essential for building a high-performance image tiling solution. Just as architectural decisions for navigation in frameworks like TanStack Router and Next.js impact performance and user experience, so too do the fundamental architectural choices in an image tiler dictate its ultimate efficiency and responsiveness.
Error Handling and Resilience in Tiling Systems
Given the complexity and resource-intensive nature of image tiling, robust error handling and resilience mechanisms are paramount. A production-grade system must anticipate and gracefully recover from failures at various stages, from corrupted input images to network outages during tile uploads.
Input Validation and Sanitization
The first line of defense is rigorous input validation. Before any heavy processing begins, the ingestion module must:
- Check File Integrity: Verify that the uploaded file is a valid image and not corrupted. Image processing libraries often throw errors for malformed files.
- Validate Format and Dimensions: Ensure the image is in an expected format and its dimensions are within acceptable limits. Extremely large or unusual aspect ratios might require special handling or be rejected.
- Sanitize Metadata: Cleanse any user-provided metadata to prevent injection attacks or unexpected behavior.
// Example Laravel validation for image upload
public function store(Request $request)
{
    $request->validate([
        'image' => 'required|image|mimes:jpeg,png,tiff|max:102400', // 100MB limit
    ]);
    // ... process image
}
Robust Queue Job Management
Asynchronous job queues are a cornerstone of resilience. They decouple components and provide mechanisms for retry and failure handling:
- Retries: Configure jobs to retry a certain number of times on failure (e.g., transient network issues, temporary resource unavailability). Laravel’s queue system allows specifying
$tries and$timeout properties for jobs. - Failed Job Handling: Jobs that exhaust their retry attempts should be moved to a ‘failed jobs’ table. This allows developers to inspect the failure, correct the underlying issue, and manually retry the job. Tools like Laravel Horizon provide excellent dashboards for managing failed jobs.
- Dead Letter Queues (DLQs): For cloud-based queue systems (e.g., AWS SQS), DLQs automatically capture messages from failed jobs, preventing them from being lost and providing a dedicated place for analysis.
- Idempotency: Design tiling jobs to be idempotent. Running the same job multiple times with the same input should produce the same result without adverse side effects. This simplifies retry logic.
Resource Management and Isolation
Tiling can be resource-hungry. Prevent one failing job from crashing the entire system:
- Process Isolation: Run queue workers in separate processes (e.g., using Supervisor or Docker containers) so that a crash in one worker doesn’t affect others.
- Memory Limits: Set appropriate memory limits for PHP processes and image processing tools.
- Timeouts: Implement timeouts for long-running operations (e.g., image processing, S3 uploads) to prevent jobs from hanging indefinitely.
Transactional Operations and State Management
Maintain consistent state in the database throughout the tiling pipeline. Use transactions where appropriate:
- When starting a tiling job, set the image status to ‘processing’.
- If the job fails, revert the status to ‘failed’ and log the error.
- If successful, set the status to ‘completed’.
// In a job's handle method
try {
    DB::beginTransaction();
    $image = Image::findOrFail($this->imageId);
    $image->status = 'processing';
    $image->save();

    // Perform tiling operations
    // ...

    $image->status = 'completed';
    $image->save();
    DB::commit();
} catch (Throwable $e) {
    DB::rollBack();
    $image = Image::findOrFail($this->imageId);
    $image->status = 'failed';
    $image->error_message = $e->getMessage();
    $image->save();
    // Log the exception
    report($e);
    // Re-throw or notify for critical failures
    throw $e;
}
Monitoring and Alerting
Proactive monitoring is crucial for resilience. Track:
- Queue Lengths: High queue lengths indicate a bottleneck in processing.
- Failed Jobs: Immediate alerts on failed jobs allow quick intervention.
- Resource Utilization: Spikes in CPU, memory, or I/O can signal issues.
- Storage Errors: Failures to upload tiles to object storage.
By meticulously designing for failure, implementing robust error handling, and actively monitoring the system, an image tiling solution can achieve high levels of reliability and resilience, ensuring that large image datasets are processed and served consistently.
Security Considerations for Image Tiling Services
Security is a non-negotiable aspect of any production system, and image tiling services are no exception. Handling potentially sensitive image data and serving it to clients requires a multi-layered security approach, addressing data integrity, access control, and protection against common web vulnerabilities.
Access Control and Authorization
Not all tiled images are meant for public consumption. Many applications require granular control over who can view which image or tile set:
- Authentication: Verify user identity using standard mechanisms (e.g., OAuth2, JWT, session-based authentication).
- Authorization: Implement robust authorization checks at the API level. When a client requests a tile (e.g.,
/images/{image_id}/{z}/{x}/{y}.jpg ), the serving layer must verify that the authenticated user has permission to access that specificimage_id . This often involves querying the database where image-to-user permissions are stored. - Signed URLs: For object storage (like S3), generating
pre-signed URLs is a common and secure method to grant temporary, time-limited access to private tiles without exposing your storage credentials. The server generates a unique URL for each tile request, which expires after a short period.
// Example of generating a presigned URL in Laravel for an S3 object
use Aws\S3\S3Client;

public function getTile(Request $request, $imageId, $z, $x, $y)
{
    // 1. Authenticate user
    // 2. Authorize user for $imageId
    if (!Auth::user()->can('view', Image::findOrFail($imageId))) {
        abort(403, 'Unauthorized access to image.');
    }

    $s3Client = new S3Client([
        'region' => env('AWS_DEFAULT_REGION'),
        'version' => 'latest',
        'credentials' => [
            'key' => env('AWS_ACCESS_KEY_ID'),
            'secret' => env('AWS_SECRET_ACCESS_KEY'),
        ],
    ]);

    $cmd = $s3Client->getCommand('GetObject', [
        'Bucket' => env('AWS_BUCKET'),
        'Key' => "tiles/{$imageId}/{$z}/{$x}/{$y}.jpg",
    ]);

    $request = $s3Client->createPresignedRequest($cmd, '+10 minutes');
    return redirect((string) $request->getUri());
}
Data Integrity and Confidentiality
- HTTPS Everywhere: All communication, from client to server and server to object storage (if using APIs), must use HTTPS to encrypt data in transit and prevent eavesdropping or tampering.
- Storage Encryption: Utilize encryption-at-rest features offered by cloud storage providers (e.g., S3 server-side encryption with KMS). This protects data even if the underlying storage is compromised.
- Image Tampering Prevention: Ensure that tiles, once generated, cannot be modified. Object storage versioning can help detect and recover from accidental changes. Content hashes (ETags) can be used to verify tile integrity upon retrieval.
Protection Against Common Web Vulnerabilities
- DDoS/Rate Limiting: Implement rate limiting at the API gateway or web server level to prevent denial-of-service attacks by excessive tile requests. CDNs often provide DDoS protection.
- Input Validation: Strictly validate all input parameters for tile requests (
image_id ,z ,x ,y ) to prevent path traversal attacks or SQL injection if these parameters are used in database queries. - Secure Configuration: Follow security best practices for all components: web servers (Nginx), database (MySQL/PostgreSQL), and application framework (Laravel). Keep software updated to patch known vulnerabilities.
- Logging and Monitoring: Implement comprehensive logging of access attempts, authorization failures, and suspicious activity. Integrate with security information and event management (SIEM) systems for real-time threat detection.
By embedding security considerations into every layer of the image tiling architecture, from the database schema for permissions to the CDN configuration and client-side access, developers can build a robust and trustworthy service for handling and delivering high-resolution imagery. Investing in a secure architecture for an image tiler contributes directly to the ROI of software development by mitigating risks, protecting valuable assets, and maintaining user trust.
Developing an Image Tiler with Laravel: A Practical Approach
Laravel, with its rich ecosystem of features like queues, file storage abstractions, and robust database integration, provides an excellent foundation for building a scalable image tiling service. Here, we outline a practical approach to integrating the core components discussed earlier within a Laravel application.
1. Setting up Storage and Queueing
First, configure Laravel’s file storage to integrate with your chosen object storage (e.g., AWS S3). The
// .env
AWS_ACCESS_KEY_ID=your_key
AWS_SECRET_ACCESS_KEY=your_secret
AWS_DEFAULT_REGION=your_region
AWS_BUCKET=your_bucket_name
QUEUE_CONNECTION=redis

// config/filesystems.php (partially)
'disks' => [
    // ... other disks
    's3' => [
        'driver' => 's3',
        'key' => env('AWS_ACCESS_KEY_ID'),
        'secret' => env('AWS_SECRET_ACCESS_KEY'),
        'region' => env('AWS_DEFAULT_REGION'),
        'bucket' => env('AWS_BUCKET'),
        'url' => env('AWS_URL'),
        'endpoint' => env('AWS_ENDPOINT'),
        'use_path_style_endpoint' => env('AWS_USE_PATH_STYLE_ENDPOINT', false),
        'throw' => false,
    ],
],
2. Image Model and Database Schema
Create an
// database/migrations/YYYY_MM_DD_create_images_table.php
Schema::create('images', function (Blueprint $table) {
    $table->uuid('id')->primary();
    $table->string('original_filename');
    $table->string('storage_path'); // Path to the original raw image
    $table->string('status')->default('pending'); // pending, processing, completed, failed
    $table->integer('width')->nullable();
    $table->integer('height')->nullable();
    $table->string('mime_type')->nullable();
    $table->text('error_message')->nullable();
    $table->timestamps();
});
3. Ingestion and Job Dispatch
A controller handles the initial image upload. After storing the raw image (e.g., to S3), it dispatches an asynchronous job to start the tiling process.
// app/Http/Controllers/ImageController.php
use Illuminate\Support\Str;
use Illuminate\Support\Facades\Storage;
use App\Jobs\ProcessImageForTiling;

public function upload(Request $request)
{
    $request->validate([
        'image' => 'required|image|mimes:jpeg,png,tiff|max:102400',
    ]);

    $file = $request->file('image');
    $uuid = (string) Str::uuid();
    $path = 'raw_images/' . $uuid . '.' . $file->extension();

    Storage::disk('s3')->put($path, file_get_contents($file->getRealPath()));

    $image = Image::create([
        'id' => $uuid,
        'original_filename' => $file->getClientOriginalName(),
        'storage_path' => $path,
        'mime_type' => $file->getMimeType(),
    ]);

    ProcessImageForTiling::dispatch($image->id)->onQueue('tiling');

    return response()->json(['message' => 'Image uploaded, tiling initiated.', 'image_id' => $uuid]);
}
4. Tiling Job Implementation
The
// app/Jobs/ProcessImageForTiling.php
use App\Models\Image;
use Illuminate\Bus\Queueable;
use Illuminate\Contracts\Queue\ShouldQueue;
use Illuminate\Foundation\Bus\Dispatchable;
use Illuminate\Queue\InteractsWithQueue;
use Illuminate\Queue\SerializesModels;
use Illuminate\Support\Facades\Storage;
use Symfony\Component\Process\Process;

class ProcessImageForTiling implements ShouldQueue
{
    use Dispatchable, InteractsWithQueue, Queueable, SerializesModels;

    public $imageId;

    public function __construct(string $imageId)
    {
        $this->imageId = $imageId;
    }

    public function handle()
    {
        $image = Image::findOrFail($this->imageId);
        $image->status = 'processing';
        $image->save();

        try {
            // 1. Download original image from S3 to local temp storage
            $localRawPath = storage_path('app/temp/' . $image->id . '_raw.' . pathinfo($image->original_filename, PATHINFO_EXTENSION));
            Storage::disk('s3')->get($image->storage_path, $localRawPath);

            // 2. Create a temporary directory for tiles
            $localTilesDir = storage_path('app/temp/' . $image->id . '_tiles');
            mkdir($localTilesDir, 0777, true);

            // 3. Use vips to generate deepzoom tiles
            // Ensure vips is installed on the worker server
            $process = new Process([
                'vips', 'dzsave', $localRawPath, $localTilesDir,
                '--layout', 'dz',
                '--suffix', '.jpg[Q=85]',
                '--tile-size', '256'
            ]);
            $process->setTimeout(3600); // 1 hour timeout
            $process->run(function ($type, $buffer) {
                // Log vips output for debugging
                // echo $buffer;
            });

            if (!$process->isSuccessful()) {
                throw new \RuntimeException($process->getErrorOutput());
            }

            // 4. Upload generated tiles to S3
            $s3TilesPath = 'tiles/' . $image->id;
            foreach (new \RecursiveIteratorIterator(new \RecursiveDirectoryIterator($localTilesDir)) as $file) {
                if ($file->isFile()) {
                    $relativePath = Str::after($file->getPathname(), $localTilesDir . '/');
                    Storage::disk('s3')->put($s3TilesPath . '/' . $relativePath, file_get_contents($file->getPathname()));
                }
            }

            // 5. Update image status and cleanup
            $image->status = 'completed';
            $image->width = (int) shell_exec("vips im_width {$localRawPath}"); // Get width after processing
            $image->height = (int) shell_exec("vips im_height {$localRawPath}"); // Get height after processing
            $image->save();

            Storage::disk('s3')->delete($image->storage_path); // Delete original raw image from S3
            Storage::disk('local')->deleteDirectory(dirname($localRawPath)); // Clean local raw image
            Storage::disk('local')->deleteDirectory($localTilesDir); // Clean local tiles

        } catch (\Throwable $e) {
            $image->status = 'failed';
            $image->error_message = $e->getMessage();
            $image->save();
            report($e);
            // Clean up temporary files even on failure
            Storage::disk('local')->deleteDirectory(dirname($localRawPath));
            Storage::disk('local')->deleteDirectory($localTilesDir);
            throw $e; // Re-throw to mark job as failed in queue
        }
    }
}
5. Serving Tiles
The serving layer can be a simple Laravel route that redirects to a pre-signed S3 URL for private images, or directly to a public S3 URL if tiles are public and cached by a CDN.
// routes/web.php or routes/api.php
use App\Http\Controllers\TileServeController;

Route::get('/images/{image_id}/tiles/{z}/{x}/{y}.jpg', [TileServeController::class, 'getTile']);
This practical approach demonstrates how Laravel’s built-in features can be orchestrated to build a powerful and scalable image tiling service, managing the entire lifecycle from upload to serving with robust error handling and asynchronous processing.
Cost Implications of Building and Operating an Image Tiling Service
Understanding the financial implications of developing and maintaining an image tiling service is crucial for strategic planning and budget allocation. Costs are primarily driven by development effort, infrastructure, and ongoing operational expenses. While specific dollar amounts fluctuate based on regional pricing, provider, and scale, we can outline the key cost factors and typical ranges.
Development Costs (One-Time)
This category covers the initial design, implementation, and testing of the image tiling system. These are largely human capital costs.
- Software Engineering (Core Tiler Logic): Designing the pipeline, integrating image processing libraries, building queue workers, and developing the API. This requires senior backend engineering expertise.
- Frontend Integration: If a custom viewer is needed, or integration with existing client-side libraries (e.g., OpenSeadragon, Leaflet) requires specific adaptations.
- Database Design & Implementation: Setting up the metadata schema, optimizing queries.
- DevOps & Infrastructure Setup: Configuring cloud resources (S3, EC2/containers for workers, CDN, database), setting up CI/CD pipelines, and monitoring.
- Quality Assurance & Testing: Rigorous testing of the tiling process, tile integrity, performance, and security. Comprehensive software testing services are essential to ensure the reliability and correctness of the generated tiles and the entire system.
Typical Range Note: Development costs vary significantly based on complexity, required features, and the team’s experience. A basic proof-of-concept might be quicker, but a production-grade, highly scalable system with advanced features will require a substantial investment.
Infrastructure Costs (Ongoing)
These are recurring costs associated with the cloud services and hardware required to run the tiler.
- Object Storage (e.g., AWS S3, GCS): Costs are based on the amount of data stored (per GB/month) and data transfer (egress) out of the storage. Tiled images can consume significant storage, especially with many zoom levels and large original images.
- Compute (e.g., AWS EC2, GCP Compute Engine, Kubernetes): Virtual machines or container instances are needed for Laravel queue workers that perform the actual image processing. Costs depend on instance type (CPU, RAM), runtime duration, and auto-scaling configurations. Tiling is CPU-intensive, so powerful instances are often required.
- Database (e.g., AWS RDS, GCP Cloud SQL): For storing image metadata and job status. Costs are based on instance size, storage, I/O operations, and backup/replication.
- Queueing Service (e.g., AWS SQS, Redis on AWS ElastiCache): Costs are typically low, based on message count or cache instance size.
- Content Delivery Network (CDN): Primarily egress costs for serving tiles to end-users. CDNs are generally more cost-effective for global delivery than serving directly from origin storage. Costs are usage-based (per GB transferred).
- Monitoring & Logging (e.g., AWS CloudWatch, Datadog): Costs for collecting, storing, and analyzing logs and metrics.
Typical Range Note: Infrastructure costs scale with the volume of images processed, the total size of tiled data, and the number of users accessing the tiles. Initial infrastructure might be modest, but costs grow with adoption and data accumulation.
Operational Costs (Ongoing)
These are the costs associated with keeping the service running smoothly after deployment.
- Maintenance & Updates: Applying security patches, upgrading libraries, adapting to new cloud service features, and ensuring compatibility.
- Monitoring & Alerting: Human oversight to respond to alerts, debug issues, and optimize performance.
- Support: Addressing user issues, data recovery, or reprocessing failed jobs.
- Data Archiving & Lifecycle Management: Moving older or less-accessed tiled data to colder, cheaper storage tiers.
Typical Range Note: Operational costs are a function of system complexity, incident frequency, and team size dedicated to support. Automated systems and robust error handling can help minimize these. The table below provides a conceptual overview of various service models for obtaining such a system, influencing the total cost.
| Service Model | Description | Cost Structure | Pros | Cons |
|---|---|---|---|---|
| In-House Development | Building the image tiler entirely with your own team. | High upfront development, ongoing infrastructure & operational. | Full control, custom fit, IP ownership. | High initial investment, requires specialized expertise, long time-to-market. |
| Custom Software Development (Agency) | Hiring a specialized agency (like NR Studio) to build the tiler. | Project-based fee or hourly rates for development, ongoing infrastructure & operational. | Access to expertise, faster delivery, clear deliverables. | Requires clear scope, potential vendor lock-in if not well-defined. |
| Managed Service/SaaS (if available) | Using a third-party service that offers image tiling as a managed solution. | Subscription fees, usage-based (per image, per TB stored/processed). | Low upfront cost, no infrastructure management, rapid deployment. | Less control, feature limitations, vendor lock-in, recurring costs can be high at scale. |
A thorough ROI analysis for software development should factor in all these cost components, balancing the initial investment with long-term operational expenses and the business value derived from efficient image handling.
Monitoring, Logging, and Observability for Production Tilers
For any production-grade image tiling service, robust monitoring, comprehensive logging, and effective observability are non-negotiable. These practices provide the insights necessary to ensure system health, diagnose issues quickly, optimize performance, and maintain a high level of reliability.
Monitoring Key Metrics
Monitoring involves tracking specific metrics that indicate the health and performance of the system. Key areas to monitor include:
- Queue Metrics:
- Queue Length: The number of pending jobs. A consistently growing queue indicates a bottleneck in worker capacity.
- Job Throughput: The rate at which jobs are processed per minute/hour.
- Job Latency: The time taken for a job to complete, from dispatch to finish.
- Failed Jobs: Number of jobs that failed and were moved to the failed jobs table. This requires immediate attention.
- Compute Resource Utilization (Workers):
- CPU Utilization: High CPU usage on worker instances is expected during tiling, but sustained 100% can indicate a need for more workers or optimization.
- Memory Usage: Crucial for image processing. High memory usage or out-of-memory errors indicate inefficient processing or undersized instances.
- Disk I/O: High disk read/write operations, especially if temporary files are used extensively.
- Storage Metrics (Object Storage & Database):
- Storage Usage: Total disk space consumed by tiles in object storage.
- API Request Rates: Number of GET/PUT requests to object storage (can impact cost).
- Database Connection Pool: Number of active/idle connections.
- Database Query Performance: Slow queries for metadata lookups.
- Network Metrics (CDN & Serving Layer):
- CDN Cache Hit Ratio: Percentage of requests served from the CDN cache versus the origin. A high ratio is desirable.
- CDN Latency: Time taken for tiles to reach end-users.
- Server Error Rates: Number of 4xx and 5xx errors from the serving API.
Tools like Prometheus with Grafana, Datadog, New Relic, or cloud-provider specific services (e.g., AWS CloudWatch, Azure Monitor) can be used to collect, visualize, and alert on these metrics.
Comprehensive Logging
Logs provide granular details about events within the system. A robust logging strategy includes:
- Application Logs: Detailed logs from your Laravel application, including job dispatch, processing steps, and status updates for images. Use varying log levels (DEBUG, INFO, WARNING, ERROR).
- Image Processing Tool Logs: Capture output from
libvips or other command-line tools, especially error messages. - Web Server Access Logs: Record every tile request, including client IP, user agent, response status, and request duration.
- Error Logs: Centralize all errors and exceptions. Laravel’s error reporting is robust, but integrate it with a centralized logging service (e.g., ELK Stack, Splunk, Loggly) for easier analysis.
Effective logging requires structured logs (e.g., JSON format) to facilitate parsing and querying. Correlation IDs (e.g., a unique ID for each image processing workflow) can link log entries across different services and components.
Observability for Deeper Insights
Observability goes beyond just monitoring and logging; it’s about being able to ask arbitrary questions about the system’s state without knowing them in advance. This is achieved through:
- Distributed Tracing: Following a request or job execution across multiple services (e.g., from API gateway -> Laravel app -> Queue -> Worker -> S3). Tools like Jaeger or Zipkin can visualize these traces, helping identify latency hot spots.
- Custom Metrics & Events: Instrumenting your code to emit custom metrics or events at critical points (e.g., ’tile_generated_event’, ‘image_resample_duration’).
- Alerting: Define clear alert rules for critical metrics and log patterns (e.g., ‘queue length > 100 for 5 minutes’, ‘5xx errors > 5%’). Integrate alerts with communication channels like Slack, PagerDuty, or email.
By implementing these observability practices, development teams can gain deep insights into the behavior of their image tiling service, proactive identify issues, and continuously improve its performance and reliability, ensuring a smooth experience for end-users.
Future Trends and Advanced Tiling Techniques
The landscape of image processing and delivery is continually evolving. As image sizes grow and user expectations for interactivity increase, image tiling services must adapt. Several future trends and advanced techniques are shaping the next generation of tilers.
Dynamic Tiling and On-Demand Generation
While pre-generating all tiles offers the best performance for serving, it can be storage-intensive and time-consuming for vast, infrequently accessed datasets. Dynamic tiling generates tiles on-demand when requested by a client. This shifts the computational burden from storage to real-time processing. Advanced systems might use a hybrid approach:
- Pre-generate lower zoom levels for quick initial load.
- Dynamically generate higher zoom levels as users zoom in, caching them for subsequent requests.
- This requires a highly optimized and fast tiling engine capable of near real-time processing.
AI-Driven Image Optimization and Tiling
Artificial intelligence and machine learning are finding applications in optimizing image processing:
- Content-Aware Tiling: Instead of fixed-size grids, AI could analyze image content to create tiles that preserve semantic objects or regions of interest, potentially reducing the number of tiles or optimizing compression per region.
- Super-Resolution: AI models can be used to upscale lower-resolution source images before tiling, creating higher-quality tiles for deeper zoom levels than the original data might intrinsically support.
- Automated Quality Assessment: AI can monitor tile quality, detecting artifacts or compression issues post-processing.
Cloud-Native and Serverless Architectures
The trend towards serverless computing (e.g., AWS Lambda, Google Cloud Functions) offers significant advantages for image tiling:
- Event-Driven Processing: An image upload to S3 can directly trigger a Lambda function to start the tiling process, eliminating the need for persistent queue workers.
- Auto-Scaling: Serverless functions automatically scale to handle bursts of image uploads without manual provisioning.
- Cost-Efficiency: You only pay for the compute time consumed during tile generation, which can be highly cost-effective for intermittent workloads.
However, serverless functions have execution limits (time, memory), which can be a challenge for very large images requiring long processing times. Orchestration with step functions (e.g., AWS Step Functions) can manage complex, multi-step serverless workflows.
WebAssembly (Wasm) for Client-Side Tiling/Processing
WebAssembly allows running high-performance code (written in C, C++, Rust) directly in the browser at near-native speeds. This opens possibilities for:
- Client-Side Tile Generation: For very specific, small-scale dynamic tiling scenarios, Wasm could enable some tile processing directly in the browser, reducing server load.
- Advanced Client-Side Rendering: More complex image manipulation or rendering algorithms can be executed client-side, offloading the server and improving interactivity.
Emerging Image Formats
New image formats like AVIF and JPEG XL offer even better compression ratios and quality than WebP. Integrating these into tiling pipelines will provide further bandwidth savings and faster loading times, though client-side support needs to mature. The challenge lies in updating the tiling engine and ensuring broad client compatibility.
These trends point towards more intelligent, efficient, and adaptable image tiling systems. As infrastructure becomes more elastic and AI more capable, the future of image tiling will likely involve highly dynamic, content-aware, and serverless architectures that deliver unparalleled performance and visual quality to users.
Real-World Examples and Use Cases of Image Tiling
Image tiling is not merely an academic concept; it underpins critical functionalities across a multitude of industries, enabling the efficient handling and visualization of vast quantities of high-resolution imagery. Understanding these real-world applications highlights the practical necessity and impact of robust tiling systems.
Mapping and Geospatial Information Systems (GIS)
This is perhaps the most ubiquitous application of image tiling. Online maps like Google Maps, OpenStreetMap, and satellite imagery services rely entirely on tiled images. When you pan or zoom, the map viewer requests only the tiles visible in your viewport at the current zoom level. This allows for seamless, interactive navigation of global datasets that would be impossible to load as a single image. Geospatial platforms use tiling for satellite imagery, aerial photography, elevation data, and various thematic map layers.
- Example: A disaster response team using a GIS platform to overlay high-resolution drone imagery of a flood zone with existing street maps, requiring rapid loading and inspection of detailed areas.
Medical Imaging and Digital Pathology
High-resolution medical scans (e.g., X-rays, MRIs, CT scans) and digital pathology slides can be gigapixels in size. Tiling is essential for pathologists and radiologists to interactively review these images without specialized, high-memory workstations. Viewers like OpenSeadragon are often customized for these domains, allowing clinicians to zoom into cellular-level detail or pan across large tissue samples efficiently.
- Example: A pathologist examining a whole-slide image of a biopsy, zooming from a macroscopic view of the tissue to individual cell structures, requiring precise rendering without lag.
Digital Archives and Cultural Heritage
Museums, libraries, and archives digitize historical documents, artworks, and rare manuscripts at extremely high resolutions to preserve them and make them accessible online. Image tiling, often leveraging the IIIF standard, allows researchers and the public to explore these intricate details without downloading massive files. This enables deep study of brushstrokes, paper texture, or faded text.
- Example: A researcher studying a medieval manuscript online, zooming in to analyze the calligraphy and illuminations in minute detail, comparing different sections of the page.
E-commerce and Product Visualization
High-end e-commerce platforms use tiling for detailed product images, allowing customers to zoom in on textures, stitching, or intricate designs. This provides a rich, immersive viewing experience that enhances consumer confidence and reduces returns.
- Example: A luxury watch retailer allowing prospective buyers to zoom into a product image to inspect the watch’s movement, dial texture, and engraving without significant loading times.
Scientific Research and Data Visualization
Many scientific disciplines generate enormous image datasets, from microscopy in biology to astronomical observations. Tiling enables researchers to explore these datasets interactively, identify patterns, and perform detailed analysis without being bottlenecked by data loading. This is particularly relevant for collaborative research where data needs to be shared and accessed remotely.
- Example: Biologists analyzing large microscopy images of cellular structures, collaboratively annotating specific regions of interest across a network.
Gaming and Virtual Environments
While often using different rendering techniques (e.g., texture atlases, mipmapping), the core concept of loading only visible portions of a large texture or map is analogous to image tiling. High-resolution skyboxes or distant terrain textures in large open-world games can leverage principles similar to tiling to manage memory and rendering performance.
These diverse applications underscore that image tiling is a foundational technology for handling and interacting with the ever-growing volume of high-resolution visual data across various domains. The demand for efficient image tilers will only continue to grow as data capture capabilities advance.
Choosing the Right Image Processing Library
The core of any image tiler is its ability to efficiently manipulate and process images. The choice of image processing library is paramount, directly impacting performance, memory usage, and the range of supported formats. Several powerful options exist, each with its strengths and weaknesses.
libvips (VIPS)
Overview:
Advantages:
- Extremely Fast: Often significantly faster than ImageMagick for large images.
- Low Memory Footprint: Crucial for processing gigapixel images on commodity hardware.
- Supports Many Formats: Comprehensive support for various input and output formats, including TIFF, JPEG, PNG, WebP, HEIF, etc.
- Deep Zoom Support: Native support for generating Deep Zoom (DZI) tile sets.
- PHP Integration: Can be used via a PHP extension (e.g.,
php-vips ) or by executing its command-line interface.
Disadvantages:
- Installation Complexity: Can be more involved to install and configure than PHP-native extensions like GD.
- Learning Curve: API might be less intuitive for developers accustomed to simpler libraries.
Use Case: Ideal for high-volume, performance-critical image tiling of extremely large images where memory is a constraint.
ImageMagick / GraphicsMagick
Overview:
Advantages:
- Feature-Rich: Offers an extensive set of image processing capabilities beyond just tiling.
- Broad Format Support: Excellent support for nearly all image formats.
- Mature & Stable: Long-standing projects with large communities.
- PHP Integration: Can be integrated via PHP extensions (
Imagick ) or by executing command-line binaries viaSymfony\Component\Process .
Disadvantages:
- Memory Usage: Can be memory-intensive for very large images, as it often attempts to load entire images into RAM. This can lead to out-of-memory errors on large inputs.
- Performance: Generally slower than
libvips for large-scale tiling tasks.
Use Case: Suitable for smaller images or when a wide range of general image manipulation tasks (beyond tiling) is required. Can be used for tiling, but with caveats for gigapixel images.
GD Library (PHP-native)
Overview: The GD Graphics Library is a PHP-native extension for dynamic image creation and manipulation. It’s built into many PHP installations.
Advantages:
- Easy to Use: Simple API for basic image operations.
- PHP-Native: No external binaries or complex installations required beyond the PHP extension.
Disadvantages:
- Performance: Significantly slower and more memory-intensive than
libvips orImageMagick for complex operations or large images. - Limited Features: Lacks advanced features and optimizations needed for high-performance tiling.
- Memory: Loads entire images into memory, making it unsuitable for gigapixel images.
Use Case: Not recommended for high-performance image tiling of large images. Best for simple operations on small images (e.g., generating thumbnails for web display).
Other Libraries (e.g., OpenCV, Pillow/Python Imaging Library)
Overview: Libraries like OpenCV (C++, Python) or Pillow (Python) are powerful for computer vision and general image processing. While they could be used for tiling, they typically require bridging to PHP (e.g., via microservices, Python scripts called by PHP).
Advantages:
- Advanced Capabilities: Offer sophisticated algorithms for image analysis, feature detection, etc.
Disadvantages:
- Integration Overhead: Not native to the PHP ecosystem, adding complexity for integration.
Conclusion: For building a high-performance image tiler in a Laravel environment,
Scaling an Image Tiler: From Monolith to Distributed System
A proof-of-concept image tiler might function adequately on a single server, but real-world demands quickly necessitate scaling. As the volume of ingested images and client requests grows, the architecture must evolve from a monolithic process to a distributed system capable of handling high throughput and ensuring low latency. This transition involves horizontal scaling at multiple layers.
Scaling the Ingestion Layer
The entry point for new images needs to handle concurrent uploads. This can be scaled by:
- Load Balancing: Distributing incoming upload requests across multiple web servers (e.g., Nginx, Apache).
- Direct-to-Cloud Uploads: Instead of proxying large files through your application server, generate pre-signed URLs that allow clients to upload directly to object storage (e.g., S3). This offloads the burden from your application servers entirely.
- Asynchronous Processing: Immediately dispatching a job to a queue after ingestion, allowing the web server to respond quickly and offloading the heavy processing to dedicated workers.
Scaling the Tiling Engine (Compute)
This is often the primary bottleneck. Scaling compute resources involves:
- Horizontal Scaling of Queue Workers: Running multiple instances of your Laravel queue workers across several virtual machines or containers. Each worker can process jobs concurrently.
- Containerization (Docker/Kubernetes): Packaging your Laravel application and its workers into Docker containers allows for easy deployment and scaling on orchestration platforms like Kubernetes. Kubernetes can automatically scale the number of worker pods based on queue length or CPU utilization.
- Specialized Instances: Using compute-optimized instances (e.g., AWS C-series) for your workers, which offer more CPU power per dollar, can significantly speed up tiling.
- Spot Instances: For non-time-critical tiling, using spot instances can drastically reduce compute costs, though they come with the risk of interruption.
# Example Kubernetes Deployment for Laravel Queue Workers
apiVersion: apps/v1
kind: Deployment
metadata:
  name: laravel-worker
spec:
  replicas: 3 # Start with 3 workers
  selector:
    matchLabels:
      app: laravel-worker
  template:
    metadata:
      labels:
        app: laravel-worker
    spec:
      containers:
      - name: worker
        image: your-docker-repo/laravel-app:latest
        command: ["php", "/var/www/html/artisan", "queue:work", "--queue=tiling", "--tries=3"]
        resources:
          requests:
            cpu: "500m"
            memory: "1Gi"
          limits:
            cpu: "1000m"
            memory: "2Gi"
        envFrom:
        - secretRef:
            name: laravel-env
Scaling the Storage Layer
Object storage inherently scales, but database performance for metadata can become an issue:
- Database Read Replicas: For read-heavy workloads (e.g., authorization checks for tile requests), use read replicas to offload queries from the primary database.
- Caching: Implement application-level caching (e.g., Redis) for frequently accessed metadata to reduce database load.
- Sharding/Partitioning: For extremely large datasets, consider sharding your database tables (e.g., by
image_id ) to distribute load across multiple database instances.
Scaling the Serving Layer (API & CDN)
This layer primarily scales through efficient caching and content delivery:
- CDN Integration: As mentioned, a CDN is the first and most effective scaling mechanism for serving static tiles.
- Load Balancing for API: Distribute API requests (e.g., for presigned URLs or metadata) across multiple application servers.
- Edge Caching: Configure CDN to cache API responses (e.g., image metadata) if they are static for a period.
Monitoring and Auto-Scaling
Crucial for a dynamically scaling system:
- Horizontal Pod Autoscaler (HPA) in Kubernetes: Automatically adjusts the number of worker pods based on CPU utilization or custom metrics (e.g., queue depth).
- Cloud Auto-Scaling Groups: For VM-based workers, configure auto-scaling groups to add/remove instances based on load.
- Proactive Monitoring: Continuously monitor queue lengths, worker CPU/memory, and CDN performance to identify and address bottlenecks before they impact users.
Scaling an image tiler is an iterative process. Start with a robust architecture, identify bottlenecks through monitoring, and apply horizontal scaling strategies at the appropriate layers. This ensures the system can gracefully handle increasing demands and maintain high performance.
Optimizing for Different Image Types and Use Cases
Not all images are created equal, and an effective image tiler must be optimized to handle diverse image types and cater to specific use cases. The strategies for tiling a photographic satellite image differ from those for a scientific diagram or a medical scan, impacting format, compression, and even tile size.
Photographic Imagery (e.g., Satellite, Drone, Artistic)
These images typically contain continuous tones, subtle gradients, and high levels of detail. The primary goal is visual fidelity and efficient compression without introducing noticeable artifacts.
- Format: JPEG or WebP (lossy) are ideal due to their excellent compression ratios for photographic content. WebP generally offers better compression at comparable quality.
- Compression Quality: A balance must be struck. Quality settings (e.g., JPEG quality 75-85) should be chosen to minimize file size while maintaining acceptable visual quality. Higher quality means larger files.
- Color Space: sRGB is standard for web display. Ensure consistent color space conversion to avoid color shifts.
- Tile Size: 256×256 or 512×512 pixels are common. Larger tiles reduce HTTP request overhead but increase individual download size.
- Optimization: Consider progressive JPEG encoding for faster initial render of tiles.
Diagrams, Charts, and Images with Sharp Edges/Text
These images contain sharp lines, distinct color blocks, and text. Lossy compression (JPEG) can introduce blurring or artifacts around edges, making text unreadable.
- Format: PNG (lossless) is preferred to preserve sharpness and prevent compression artifacts. WebP (lossless mode) is an excellent alternative that often offers smaller file sizes than PNG.
- Compression Quality: Not applicable for lossless PNG/WebP, but PNG compression levels can be tuned for file size (though it’s lossless).
- Transparency: PNG and WebP natively support alpha channels, which is crucial for overlaying diagrams on other backgrounds.
- Tile Size: Standard sizes (256×256, 512×512) are usually fine.
- Optimization: Ensure anti-aliasing is handled correctly during resampling to maintain crisp lines.
Medical Images (e.g., Pathology Slides, Radiographs)
Medical images often have specific requirements for fidelity, color accuracy, and sometimes even specialized metadata.
- Format: Often TIFF (uncompressed or lossless LZW/JPEG2000) for the original source, but tiles might be JPEG or WebP for web delivery, with very high quality settings. Lossless compression might be mandated for diagnostic purposes, requiring careful consideration.
- Color Space: Often specific medical color profiles. Accurate conversion is critical.
- Metadata: DICOM metadata from original scans might need to be preserved or indexed alongside the tiled image.
- Tile Size: Can vary. Some medical viewers prefer larger tiles or specific overlap.
- Security: Enhanced access control and audit trails are paramount due to patient data sensitivity.
Sparse Images (e.g., Astronomical Data, Scanned Documents with Large Margins)
Images with large areas of uniform color, transparency, or blank space.
- Optimization: Implement
sparse tiling . Do not generate or store tiles that are entirely empty or contain minimal, uninteresting data. This significantly reduces storage costs and processing time. - Format: PNG or lossless WebP if transparency is needed for blank areas.
High Dynamic Range (HDR) Images
Images with a much greater range of luminosity than standard dynamic range images, often used in scientific visualization or advanced photography.
- Format: Specific formats like OpenEXR or HDR JPEG. Tiling these for web requires careful tone mapping and potentially conversion to standard formats for browser compatibility, or specialized client-side viewers.
- Processing: Tone mapping to SDR (Standard Dynamic Range) is often required for web display.
By understanding the characteristics and requirements of different image types, developers can tailor their image tiler’s configuration, from format and compression to tiling strategy and client-side integration, to deliver the best possible experience for each specific use case. This nuanced approach ensures both performance and visual accuracy.
Architectural Patterns for Resilience and High Availability
Building an image tiler for production environments requires an architecture that is not only scalable but also resilient and highly available. This means the system must be able to withstand failures of individual components without suffering significant downtime or data loss. Implementing specific architectural patterns can achieve this.
1. Decoupling with Asynchronous Queues
The most fundamental pattern for resilience is to decouple the ingestion and processing phases using an asynchronous message queue. This prevents a failure in the tiling engine from impacting the frontend or other parts of the system.
- Benefit: If a worker crashes, the job remains in the queue and can be retried by another worker. The ingestion API remains responsive.
- Implementation: Laravel’s queue system with Redis, RabbitMQ, or cloud services like AWS SQS. Ensure queues are durable and messages persist across restarts.
2. Redundancy and Failover for Critical Components
Every single point of failure (SPOF) must be addressed with redundancy.
- Load Balancers: Distribute traffic across multiple web servers, ensuring that if one server fails, others can take over.
- Multiple Application Instances: Run several instances of your Laravel application (web servers and queue workers) across different availability zones.
- Clustered Database: Use a highly available database setup (e.g., AWS RDS Multi-AZ, PostgreSQL replication, Galera Cluster for MySQL). If the primary database fails, a replica can be promoted.
- Object Storage: Cloud object storage (S3, GCS) is inherently highly available and durable, with data replicated across multiple facilities.
3. Stateless Application Servers
Design your web and worker application servers to be stateless. This means they do not store any session data or temporary files that are essential for their operation locally. All state should be externalized to a database, cache, or object storage.
- Benefit: Any application server can be replaced or restarted at any time without losing critical data or disrupting ongoing operations. Simplifies scaling.
- Implementation: Store uploaded raw images directly to S3 or a shared volume. Use external session drivers (Redis, database) for Laravel sessions.
4. Circuit Breaker Pattern
When your image tiler depends on external services (e.g., an external API for image metadata, a third-party image processing service), implement a circuit breaker pattern. This prevents a cascading failure if a dependency becomes unhealthy.
- Benefit: When a dependency repeatedly fails, the circuit breaker ‘trips’, preventing further calls to that service and allowing it time to recover, while your application can fail fast or use a fallback.
- Implementation: Libraries like
laravel-circuit-breaker or custom logic can be used.
5. Idempotent Operations
Ensure that core operations, especially tile generation and upload, are idempotent. This means performing the operation multiple times with the same input yields the same result without unintended side effects.
- Benefit: Simplifies retry logic. If a job fails mid-way and is retried, it won’t create duplicate tiles or corrupt existing data.
- Implementation: Check for existence before creation (e.g., check if a tile exists in S3 before uploading). Use unique identifiers for resources.
6. Disaster Recovery and Backup Strategy
Beyond high availability, plan for disaster recovery:
- Database Backups: Regular, automated backups of your metadata database. Test restoration procedures.
- Cross-Region Replication: For critical data in object storage, consider replicating buckets to a different geographical region for extreme disaster recovery scenarios.
- Infrastructure as Code: Define your infrastructure (servers, databases, networks) using tools like Terraform or CloudFormation. This allows for rapid re-provisioning in a disaster.
By systematically applying these architectural patterns, an image tiling service can be engineered to be highly resilient, capable of absorbing failures, and providing continuous availability even under adverse conditions. This level of robustness is crucial for mission-critical applications that rely on consistent image delivery.
Factors That Affect Development Cost
- Software Engineering for Core Logic
- Frontend Integration (if custom viewer needed)
- Database Design & Implementation
- DevOps & Infrastructure Setup
- Quality Assurance & Testing
- Object Storage Usage (per GB/month)
- Compute Instances (CPU, RAM, runtime)
- Database Instance Size & I/O
- Queueing Service Usage
- Content Delivery Network (CDN) Egress
- Monitoring & Logging Services
- Ongoing Maintenance & Updates
- Operational Support
Costs for building and operating an image tiling service vary significantly based on the complexity of the project, the scale of image data, the chosen cloud provider, and the level of ongoing operational support required.
Building a high-performance image tiler is a multifaceted engineering challenge, requiring careful consideration of architectural choices, processing algorithms, storage strategies, and operational resilience. From the initial ingestion of massive images to their efficient delivery via CDNs, every component in the pipeline must be optimized for speed, scalability, and reliability. The choice of robust image processing libraries like libvips, coupled with asynchronous processing via job queues, forms the backbone of an effective solution, particularly within frameworks like Laravel.
The ultimate goal is to transform unwieldy, high-resolution imagery into a dynamic, interactive experience for end-users, across diverse applications from mapping to medical diagnostics. By embracing best practices in performance engineering, security, and observability, organizations can deploy image tiling services that not only meet current demands but are also poised for future growth and evolving technological landscapes. If you are grappling with the complexities of large image processing or need to architect a bespoke tiling solution, our team at NR Studio specializes in custom software development that addresses these precise challenges.
Explore our complete Laravel, Basics directory for more guides.
NR Studio builds custom web apps, mobile apps, SaaS platforms, and internal tools for growing businesses. If you’re working through a technical decision, feel free to reach out — no commitment required.