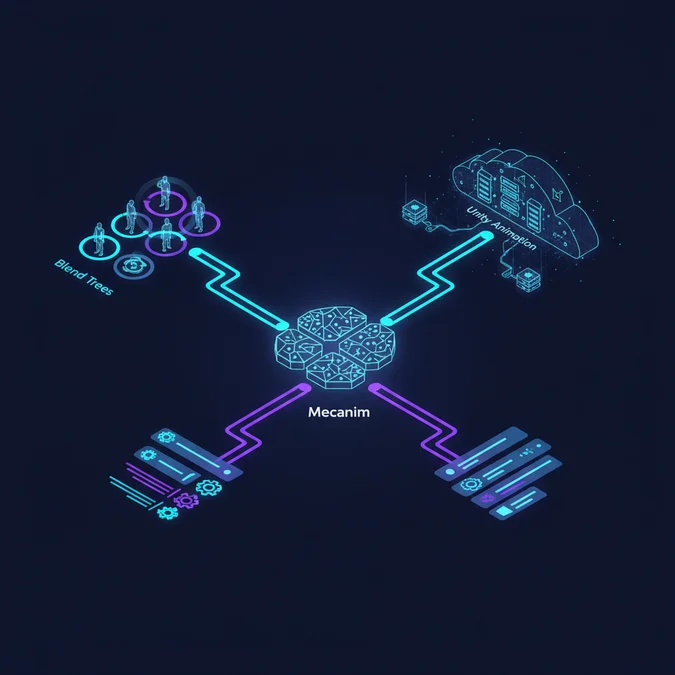

A character controller fails silently when its animation evaluation loop desynchronizes from physics ticks, triggering visible micro-stutter, phantom root motion displacement, or frame-rate collapsing GC spikes. In the Unity runtime, animation is not merely an aesthetic presentation layer; it is an intensive transform mutation system that directly interacts with the scene graph, memory allocations, and multi-threaded worker pipelines.
Achieving stable, 60-to-120 FPS character rendering across diverse platforms demands moving past the default drag-and-drop workflow. Engineering teams must understand the exact internal trade-offs between the visual state machines of Mecanim, low-level programmatic pipelines using the Playables API, and runtime kinematic procedural modifications through Animation Rigging.
This architectural guide provides a concrete breakdown of the Unity animation subsystem. It explores keyframe curves, state machine transitions, zero-allocation C# evaluation patterns, and scalable crowd processing strategies engineered for high-performance production environments.
Unity Animation Ecosystem: Mecanim, Playables, and Rigs
The contemporary unity animation runtime architecture is composed of distinct subsystem layers. Rather than a singular framework, Unity supplies multiple complementary systems suited for distinct performance profiles, input controls, and authoring requirements. Dissecting these runtime primitives is essential for preventing architectural dead ends midway through production.
| System Architecture | Evaluation Pipeline | Thread Profile | Primary Production Target | Memory & CPU Footprint |
|---|---|---|---|---|
| Legacy Animation | Native GameObject Component | Single-threaded (Main Thread) | Simple legacy transforms, UI | Minimal state footprint, poor batching |
| Mecanim (Animator) | Native Director / Graph Evaluation | Multi-threaded Worker Threads | Standard Humanoid/Generic gameplay | High baseline memory, complex state overhead |
| Playables API | Custom C# Data Graph (PlayableGraph) | Parallel Worker Threads | Crowds, cutscenes, dynamic trees | Zero state allocation, custom pooling |
| Animation Rigging | Procedural Constraints Pipeline | Evaluated during Animation Pass | Runtime IK, targeting, secondary motion | Moderate compute cost per constrained bone |
At the center of typical character setups sits the Animator component, backed by an Avatar mapping definition. The Avatar translates raw bone hierarchies into a standardized muscle-space orientation for Humanoid rigs, or binds directly to bone transforms in Generic mode. Behind this component, the native Mecanim engine parses transition graphs, calculates dynamic blending, and schedules bone-transform evaluation jobs across native C++ worker threads before committing results back to the transform hierarchy.
Architecture Rule: Never select Humanoid mode simply because a character has two arms and two legs. Humanoid retargeting imposes an approximate 20% to 35% CPU overhead due to runtime muscle-space translation. If your pipeline does not require retargeting animations across differing skeletal proportions, utilize Generic rigs for strictly optimized bone-transform matching.
How to Make Animation in Unity Using Keyframes and Dopesheet Tools
Building clips directly inside the editor remains essential for UI transitions, programmatic cutscenes, and 2D sprite sequencing. Understanding how to make animation in unity using the internal authoring suite requires mastering both the Dopesheet frame layout and the Curve Editor mathematics.
- Initialize the Transform Pipeline: Attach an
Animator component to the root entity. Open the Animation Window (Ctrl+6 / Cmd+6) and click Create to generate an .anim asset file and an associated controller. - Establish the Binding Target: Enter record mode (red icon) or preview mode. Select child nodes or components (such as
SpriteRenderer, Transform, or UI CanvasGroup) to register modification listeners on those memory addresses. - Interpolate Tangents: Switch from the Dopesheet to the Curves tab. Adjust tangent properties (Auto, Clamped, Free Smooth, Flat, Broken) to control acceleration profiles and prevent overshooting on non-linear spatial moves.
- Attach Runtime Animation Events: Add keyframe event markers along the timeline. These bind strictly to public C# parameter signatures (strings, floats, ints, or Object references) exposed on scripts residing on the exact GameObject housing the Animator.
Authoring Verification Checklist
- Confirm all cyclic loops (walk, run, idle) demonstrate identical transform values at frame 0 and the terminal frame to prevent transition popping.
- Ensure tangents on continuous cycles are set to Free Smooth or Flat with matched angles across loop boundaries.
- Eliminate empty animated curves; unused channels bound to inactive components still trigger evaluation calculations in the native loop.
- Verify that 2D sprite sequences utilize discrete constant stepping tangents rather than linear float interpolation across sprite frames.
How to Create Animation in Unity with State Machines and Blend Trees
When architecting systemic character controllers, knowing how to create animation in unity moves past raw clip authoring into state machine engineering. The Animator Controller is a hierarchical finite-state machine (HFSM) compiled into native state evaluation trees.
- State Machine Graph Setup: Create an Animator Controller and partition states into logical sub-state machines (for example, Locomotion, Combat, Traversal) to prevent spaghetti transitions across states.
- Parameter Initialization: Declare parameters (Float, Int, Bool, Trigger) within the controller window. These values dictate evaluation branching at state transitions.
- Transition Optimization: Define conditions with zero exit time for immediate actions (like taking damage or jumping) and calibrated exit times with cross-fade durations (0.1s to 0.25s) for smooth rhythmic cycles.
- Blend Tree Assembly: Group multi-directional movement clips into 1D (speed), 2D Simple Directional (strafe), or 2D Freeform Directional (complex dual-axis velocity) nodes to eliminate combinatorial state explosion.
Blend Tree Dimension Input Parameters Vector Space Calculation Ideal Use Case 1D Single Float (e.g. Forward Speed) Linear interpolation between sample thresholds Forward locomotion (Walk to Run to Sprint) 2D Simple Directional Velocity X, Velocity Z Polar coordinate cross-fading (< 180 degrees separation) Basic multi-directional strafing with single walk clip per axis 2D Freeform Directional Input X, Input Y Gradient Band interpolation with root velocities Complex multi-directional strafes with diverse animation directions 2D Freeform Cartesian Delta Position X, Delta Position Z Delaunay triangulation across linear coordinate space Non-directional blending, acceleration dynamics
To keep the state machine maintainable, use Sub-State Machines and Layer Masking. By isolating upper-body combat actions to an additive or override Animator Layer driven by an Avatar Mask, the baseline locomotion graph remains decoupled from weapon firing, reloading, and hand interactions.
Optimizing Programmatic Control: C# Drivers and StateMachineBehaviours
High-frequency string-based API calls to the Animator component introduce avoidable performance costs. Methods like animator.SetBool("isRunning", true) compute a string hash every single invocation, creating overhead in tight update loops. Modern engineering practices mandate zero-allocation programmatic control using cached integer identifiers and decoupled StateMachineBehaviour classes.
using UnityEngine; public sealed class CharacterAnimationDriver: MonoBehaviour { [SerializeField] private Animator animator; [SerializeField] private CharacterController controller; private int velocityXHash; private int velocityZHash; private int groundedHash; private int attackTriggerHash; private readonly Vector2 dampTime = new Vector2(0.15f, 0.15f); private void Awake() { if (animator == null) { animator = GetComponent<Animator>(); } velocityXHash = Animator.StringToHash("VelocityX"); velocityZHash = Animator.StringToHash("VelocityZ"); groundedHash = Animator.StringToHash("IsGrounded"); attackTriggerHash = Animator.StringToHash("AttackTrigger"); } private void Update() { Vector3 localVelocity = transform.InverseTransformDirection(controller.velocity); animator.SetFloat(velocityXHash, localVelocity.x, dampTime.x, Time.deltaTime); animator.SetFloat(velocityZHash, localVelocity.z, dampTime.y, Time.deltaTime); animator.SetBool(groundedHash, controller.isGrounded); } public void ExecuteMeleeAttack() { animator.SetTrigger(attackTriggerHash); } }
Decouple state logic by attaching custom StateMachineBehaviour instances directly onto specific nodes within the Animator graph. This pattern isolates state-specific audio, trail emissions, or physics constraints away from monolithic character controller scripts.
using UnityEngine; public sealed class AttackStateTracker: StateMachineBehaviour { [SerializeField] private string combatHitboxTag = "WeaponHitbox"; private Collider weaponCollider; override public void OnStateEnter(Animator animator, AnimatorStateInfo stateInfo, int layerIndex) { if (weaponCollider == null) { GameObject hitbox = GameObject.FindWithTag(combatHitboxTag); if (hitbox!= null) weaponCollider = hitbox.GetComponent<Collider>(); } if (weaponCollider!= null) weaponCollider.enabled = true; } override public void OnStateExit(Animator animator, AnimatorStateInfo stateInfo, int layerIndex) { if (weaponCollider!= null) weaponCollider.enabled = false; } }
Engine Diagnostic: Avoid executing expensive lookup calls like GameObject.FindWithTag inside OnStateEnter during active gameplay loops. Always cache component references during warm-up initialization or inject them through shared dependency contexts to protect zero-allocation frame boundaries.
High-Performance Scaling: Mecanim vs Playables API for Large Crowds
When rendering hundreds of interacting characters simultaneously (such as zombie swarms or battlefield troops), the baseline CPU cost of managing standard Mecanim state machines becomes a clear bottleneck. Every active Animator evaluates its state graph every tick, even if state transitions are static. The Playables API replaces this overhead with low-level, procedural animation graphs executed through native code.
Metric & Runtime Cost
Mecanim State Machine
Playables API (Manual Graph)
GPU Vertex Animation (VAT)
Memory Footprint (500 units)
~45 MB (Individual Controllers)
~4 MB (Shared PlayableGraph data)
< 1 MB (Texture Buffer)
Transform Evaluation Mode
C++ Multi-threaded Worker Pass
C++ Graph with Direct C# Control
GPU Vertex Shader Pass
Garbage Collection Allocations
0 bytes (if hashes cached)
0 bytes (Struct-based handles)
0 bytes
Procedural Layer Blending
Rigid layer structure
Dynamic runtime graph rewiring
Unsupported without shader compute
Max Active Units @ 60 FPS
150 to 300 units
800 to 1,500 units
10,000+ units
The following production script illustrates building a high-performance linear animation mixer using the Playables API, bypassing Animator state machine evaluation entirely:
using UnityEngine; using UnityEngine.Playables; using UnityEngine.Animations; public sealed class CrowdAgentPlayableDriver: MonoBehaviour { [SerializeField] private AnimationClip idleClip; [SerializeField] private AnimationClip marchClip; private PlayableGraph playableGraph; private AnimationMixerPlayable mixerPlayable; private void Start() { playableGraph = PlayableGraph.Create($"AgentGraph_{gameObject.GetInstanceID()}"); playableGraph.SetTimeUpdateMode(DirectorUpdateMode.GameTime); var playableOutput = AnimationPlayableOutput.Create(playableGraph, "Animation", GetComponent<Animator>()); mixerPlayable = AnimationMixerPlayable.Create(playableGraph, 2); playableOutput.SetSourcePlayable(mixerPlayable); var idlePlayable = AnimationClipPlayable.Create(playableGraph, idleClip); var marchPlayable = AnimationClipPlayable.Create(playableGraph, marchClip); playableGraph.Connect(idlePlayable, 0, mixerPlayable, 0); playableGraph.Connect(marchPlayable, 0, mixerPlayable, 1); mixerPlayable.SetInputWeight(0, 1.0f); mixerPlayable.SetInputWeight(1, 0.0f); playableGraph.Play(); } public void SetBlendWeight(float normalizedSpeed) { float clamped = Mathf.Clamp01(normalizedSpeed); mixerPlayable.SetInputWeight(0, 1.0f - clamped); mixerPlayable.SetInputWeight(1, clamped); } private void OnDestroy() { if (playableGraph.IsValid()) { playableGraph.Destroy(); } } }
Troubleshooting Common Runtime Animation Traps in Unity
Debugging animation bugs requires isolating issues across clip import settings, rig avatar configurations, and component properties. Use this systematic troubleshooting guide to diagnose and resolve frequent runtime errors.
Observed Symptom
Primary Root Cause
Target Diagnostic Location
Production Remediation
Foot sliding during transitions
Missing or misconfigured Root Motion
Animator Component / FBX Import
Enable Apply Root Motion or extract positional curves into movement scripts.
Character drifts up or down over time
Root Transform Position (Y) unbaked
FBX Import Settings > Animation
Toggle Bake Into Pose for Root Transform Position (Y) with Based Upon: Original.
Animation layer overrides lower layers
Weight set to 1.0 without Avatar Mask
Animator Controller Layer Settings
Assign a specific Avatar Mask and switch layer blending mode from Override to Additive.
Retargeted mesh warps unnatural bones
Mismatched T-Pose during Avatar setup
Avatar Configuration > Pose
Enforce Enforce T-Pose inside the Humanoid Avatar configuration menu before importing animations.
Animator ignores transition triggers
Trigger consumed during transition interruptions
Transition Inspector Settings
Adjust Interruption Source to Next State or Current State, or use explicit Bools instead of Triggers.
Runtime Diagnostic Protocol
- Avatar Retargeting Drift: Open the FBX Model import settings. Inspect the rig tab. If bone mappings display red warnings, standard humanoid muscle limits are exceeded. Re-map manually and re-enforce the T-pose definition.
- Root Motion Conflicts: If character controllers manage entity velocity directly through C#, always disable
Apply Root Motion on the Animator. Leaving both active results in doubled movement velocities.
- Culling Mode Bottlenecks: Adjust the Animator
Culling Mode from Always Animate to Cull Update Transforms or Cull Completely for offscreen entities to reclaim CPU overhead instantly.
Frequently Asked Questions
What is the primary difference between Mecanim and the Playables API in Unity?
Mecanim provides a visual, state machine-driven framework ideal for standard characters with complex state transitions. The Playables API is a low-level C# data-oriented system that evaluates animation graphs programmatically, bypassing Animator state machine overhead to optimize performance for large crowds.
How do you avoid garbage collection spikes when triggering animations via script?
Cache all animation parameter names into integer IDs using Animator.StringToHash during initialization. Passing string names directly into Animator methods like SetTrigger or SetFloat causes runtime string hashing and unneeded heap allocations during high-frequency gameplay updates.
How to make animation in Unity run without moving the character out of place?
Toggle the Apply Root Motion setting on the Animator component. When disabled, the animation clip transform changes remain visual only, allowing character movement to be controlled entirely through code, a CharacterController, or Rigidbody physics calculations.
How to create animation in Unity for 2D sprites versus 3D skinned meshes?
For 2D sprites, keyframe SpriteRenderer.sprite properties across timeline samples or swap frames via Sprite Resolver. For 3D meshes, configure an Avatar asset (Humanoid or Generic) and map keyframed bones or blend shapes inside an Animator Controller.
A well-architected animation system balances visual fidelity with predictable runtime performance. By selecting the correct rig structure, caching parameter hashes to preserve zero-allocation frame boundaries, and migrating performance-critical entities to the Playables API, you protect your game's frame budget across all target platforms.
Audit your project's current animation overhead using the Unity Profiler. Profile the Animation.Update and DirectorUpdate timelines, eliminate uncached parameter lookups, and ensure offscreen characters are properly culled to maximize hardware efficiency.
References & Further Reading